
The Fall Listing Checklist: How to Prepare a Home Before It Hits the Market
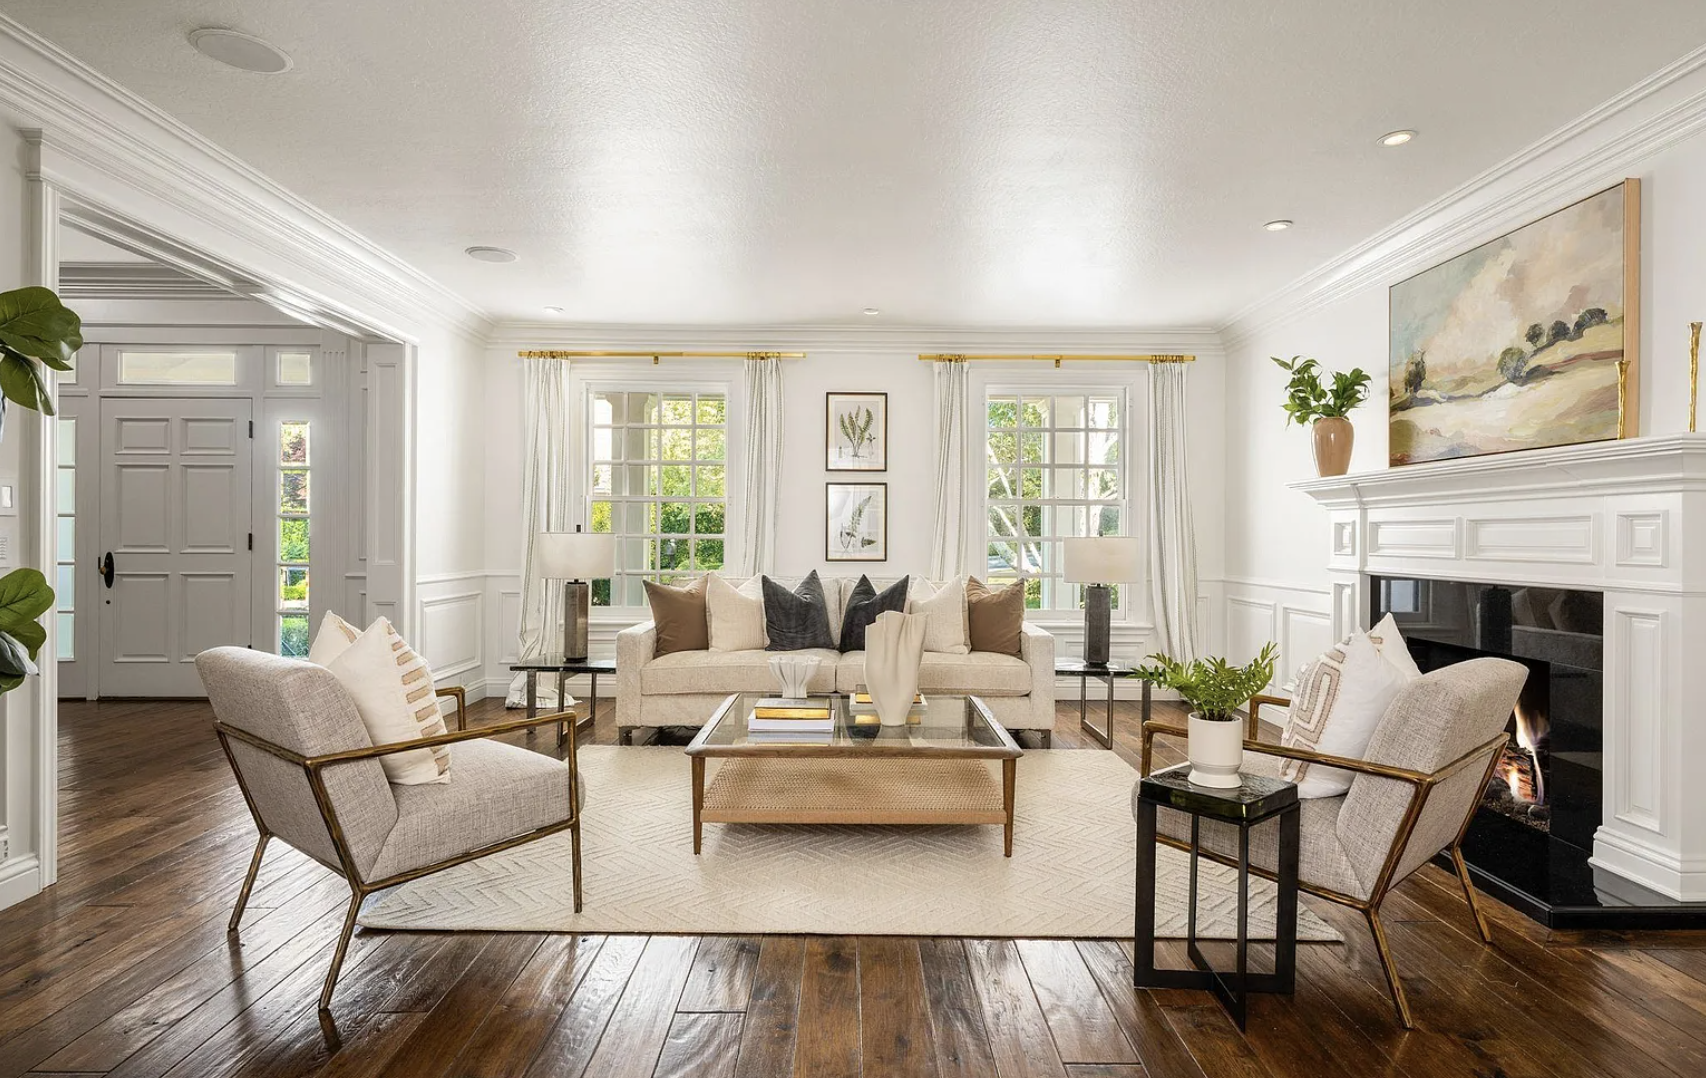
A successful listing rarely comes together in the few days before photography.
The strongest homes are usually the ones where the agent, seller, stager, contractors, and photographer are working toward the same goal well before the property officially hits the market.
For realtors, that means thinking beyond the staging appointment itself. Paint, flooring, lighting, repairs, furniture, styling, photography, and even the timing of move-out can all affect how polished a home ultimately looks online.
And in the East Bay, where buyers are often comparing beautifully presented homes in communities like Alamo, Danville, Lafayette, Orinda, and Walnut Creek, those details matter.
Here’s the checklist we recommend working through before your next listing goes live.
1. Bring in the stager earlier than you think
One of the easiest ways to make the listing process smoother is to involve your home stager before every other decision has already been made.
A staging consultation can help identify:
Furniture that should stay or go
Rooms that need editing
Paint colors that may photograph poorly
Light fixtures that date the home
Areas that need minor repairs
Spaces that buyers may have trouble understanding
Rooms where scale or layout could become an issue
This is especially helpful with occupied homes. Instead of asking sellers to declutter without direction, a stager can give them a clear plan based on what will actually make a difference once the home is photographed.
For vacant properties, early planning also gives the staging team enough time to select furniture that fits the scale, architecture, and likely buyer for the home.
The goal: Make staging part of the pre-listing strategy, rather than the final item on the to-do list.
2. Address the surfaces buyers notice immediately
Before furniture enters the equation, buyers are already responding to the home itself.
Walls, floors, lighting, windows, hardware, and finishes create the backdrop for everything that follows.
Before staging, take a close look at:
Paint
Fresh paint can dramatically change the way a room feels and photographs.
Pay particular attention to:
Very dark or highly saturated colors
Scuffed walls and baseboards
Patchy touch-ups
Outdated accent walls
Colors that change dramatically in photographs
The goal isn't to strip every home of personality. It's to create a cohesive backdrop that lets the architecture and staging do their jobs.
Flooring
Worn carpet, damaged flooring, or heavily dated finishes can become even more noticeable in listing photography.
Not every floor needs replacing, but it's worth determining early whether cleaning, refinishing, repair, or replacement will materially improve the presentation of the home.
Lighting
Lighting has an enormous effect on both the in-person experience and the photography.
Before photos, make sure:
Bulbs are working
Color temperatures are reasonably consistent
Very dated fixtures have been evaluated
Dark spaces have adequate lighting
Window treatments aren't unnecessarily blocking natural light
Good staging can enhance a room, but it can't completely compensate for a space that feels dim.
3. Edit before you style
For an occupied listing, staging often starts with what gets removed.
Too much furniture can make rooms appear smaller. Too many accessories compete with the architecture. And highly personal items can make it harder for buyers to imagine themselves living in the home.
That doesn't mean every occupied home should feel empty.
The goal is editing, not stripping.
We typically look at:
Furniture scale and placement
Extra chairs or occasional tables
Bookshelves and built-ins
Kitchen counters
Bathroom counters
Family photos
Collections
Children's spaces
Home offices
Closets visible during showings
Once the visual noise is reduced, the pieces that remain become much more effective.
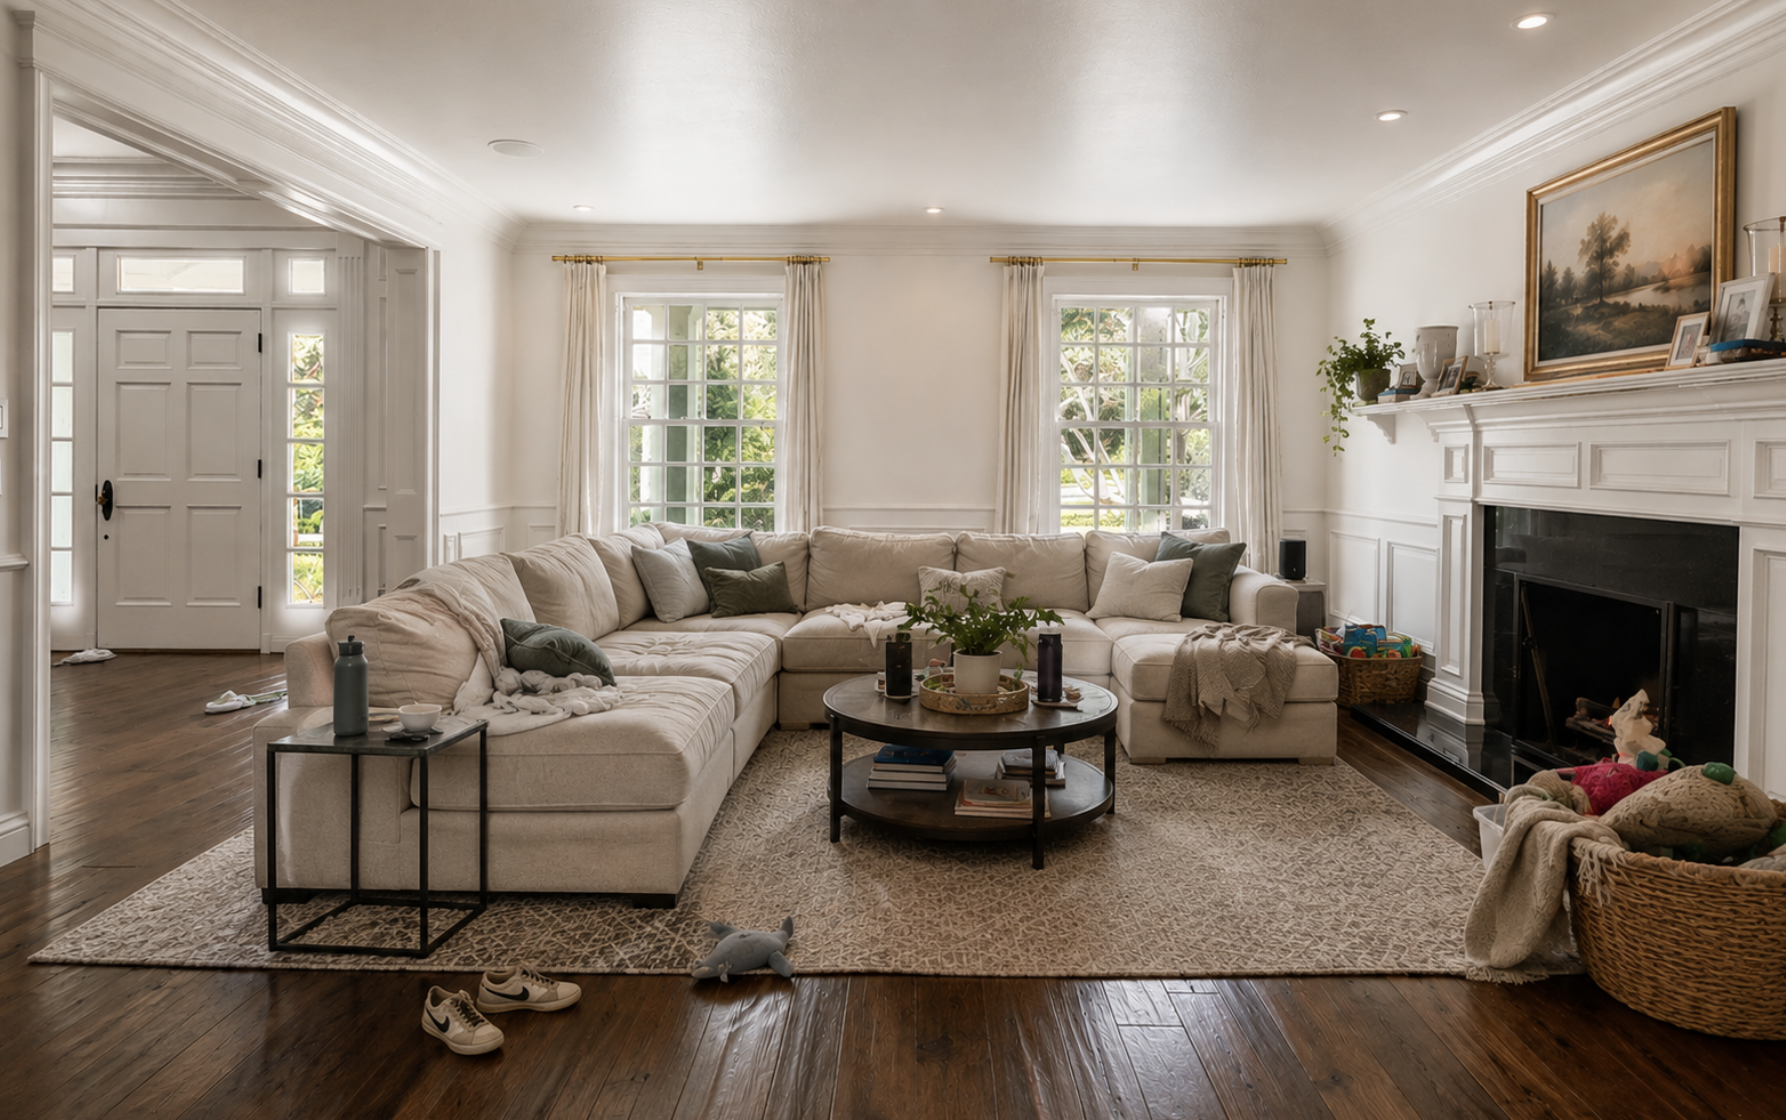
An occupied home in Alamo BEFORE staging
4. Stage for the buyer, not necessarily for the seller
A room can be perfectly functional for the people currently living there and still need to change for the market.
That's because staging isn't decorating.
It's marketing.
The question isn't simply, "Does this room look pretty?"
It's:
"Does a buyer immediately understand what this room is, how large it is, and how they might use it?"
That might mean converting a lightly used sitting room into a home office, giving an awkward corner a clear purpose, or changing a furniture layout so the focal point of the room becomes obvious.
For agents, this is where staging becomes especially valuable. It helps translate a home's square footage and architecture into a lifestyle buyers can understand almost instantly.
See how thoughtful furniture scale, layout, and styling transformed this Alamo property.
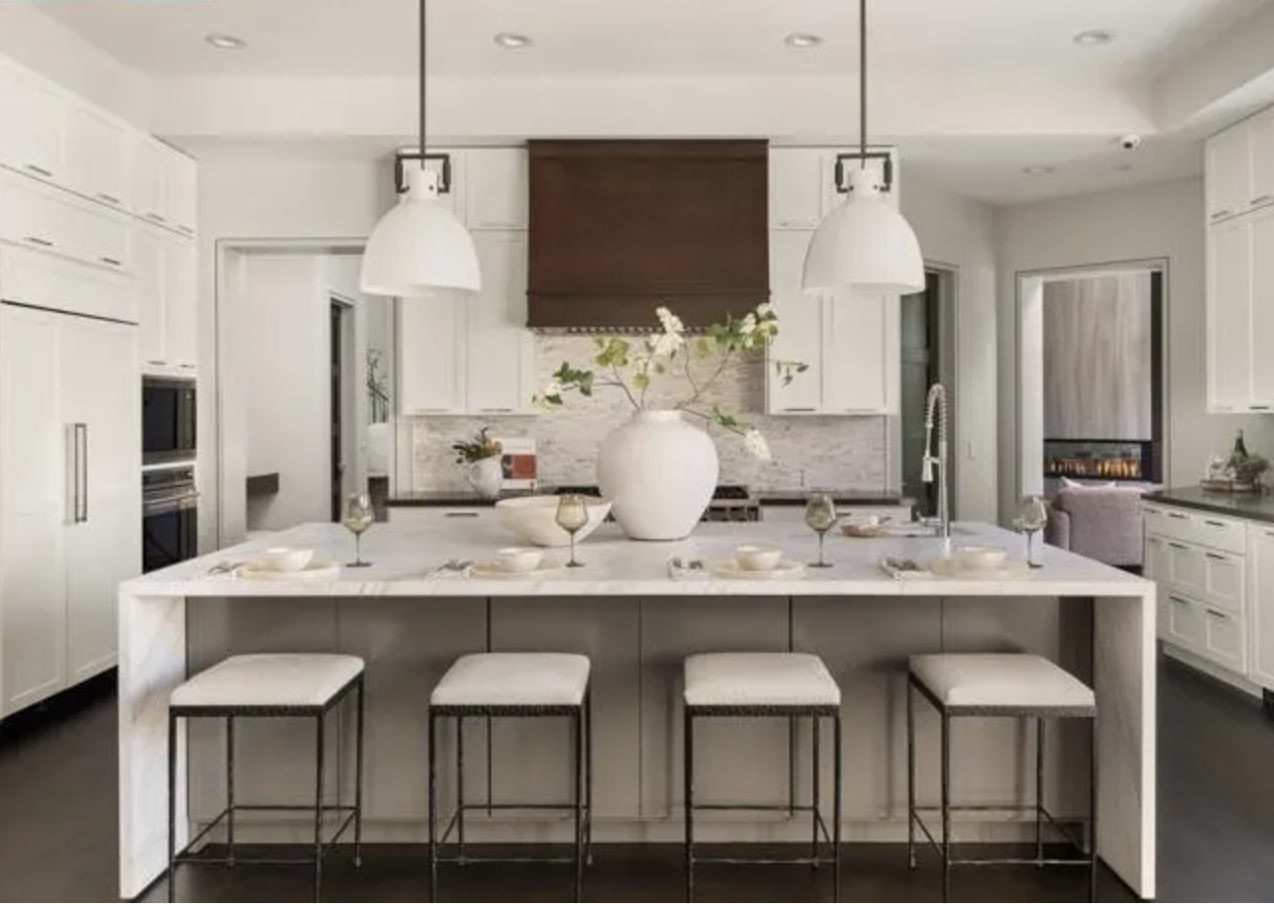
5. Finish staging before the photographer arrives
Photography should document the finished product, not become part of the styling process.
Ideally, by the time the photographer walks in:
Furniture placement is final
Beds are styled
Artwork is installed
Accessories are complete
Counters are edited
Cords and miscellaneous items are hidden
Window treatments are adjusted
Outdoor areas are ready
Seller belongings that need to disappear are already gone
Trying to make major styling decisions while the photographer is waiting creates unnecessary pressure and can lead to details being missed.
For the smoothest process, build in a little breathing room between staging and photography whenever the listing timeline allows.
6. Look at the home through the camera's lens
A home can feel beautiful in person and still need adjustments before photography.
Cameras flatten spaces. Wide-angle lenses reveal clutter. Small objects that disappear in person can become strangely distracting in a photograph.
Before photo day, walk through each room and pay attention to:
Uneven bedding
Crooked lampshades
Visible cords
Trash cans
Pet supplies
Toiletries
Cleaning products
Refrigerator clutter
Too many pillows
Small accessories scattered across surfaces
Items visible through glass doors
Anything sitting on the floor without a clear purpose
These details are tiny individually, but collectively they determine whether the finished photography feels polished.
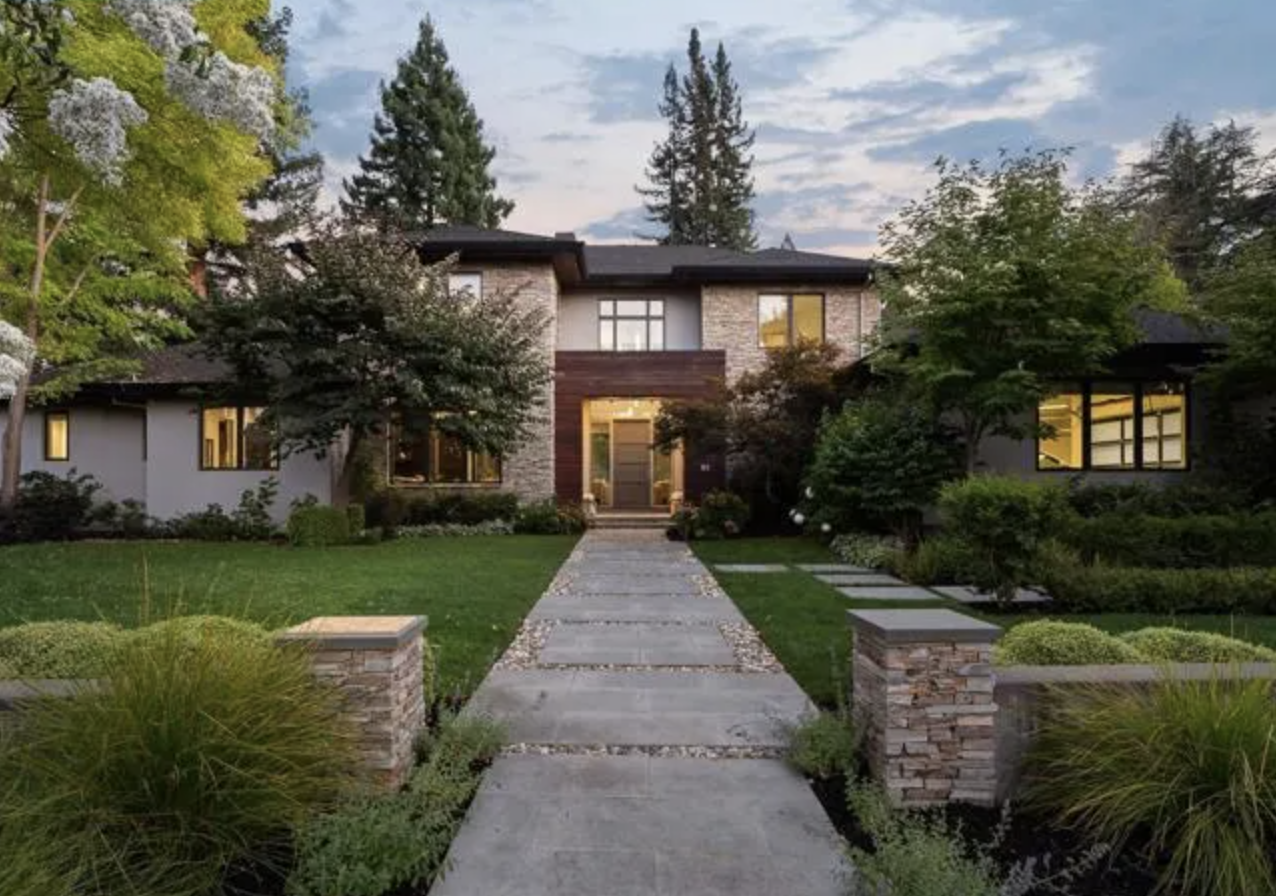
7. Don't forget the exterior
Buyers are forming an impression before they ever reach the front door.
During fall, exterior maintenance can become especially important as leaves, weather, and shorter days begin to affect how a property presents.
Before photography and showings:
Clear walkways and porches
Remove dead or tired seasonal plants
Clean exterior furniture
Sweep leaves and debris
Check exterior lighting
Remove garden hoses, toys, and tools
Style outdoor entertaining spaces if they are an important selling feature
Make sure the front entry feels intentional and welcoming
A beautiful interior paired with a neglected entrance creates a disconnect.
The experience should feel considered from the curb onward.
8. Give the seller a clear final checklist
The days leading up to a listing can be overwhelming for homeowners.
A specific checklist is much more useful than simply telling someone to "declutter."
Before staging and photography, sellers may need to:
Pack personal photographs
Clear bathroom and kitchen counters
Remove excess furniture
Put away pet supplies
Organize children's belongings
Remove valuables and medications
Complete minor repairs
Schedule cleaners
Finish landscaping
Arrange for storage or moving
Make plans to be out of the house during staging or photography
When everyone knows what needs to happen and when, the entire process becomes easier.
A simple pre-listing timeline
Every property is different, but a well-planned listing might look something like this:
2–4 weeks before photography:
Walk the property, schedule staging consultation, identify repairs, paint, flooring, landscaping, and vendor needs.
1–2 weeks before photography:
Complete repairs and painting, begin seller editing and packing, confirm staging and photography dates.
Several days before photography:
Deep clean, finish landscaping, remove excess belongings, complete any furniture moves.
Staging day:
Furniture, artwork, accessories, and final styling are installed.
Photography day:
The home is fully finished and ready to be documented.
The exact schedule will vary, particularly with occupied homes or larger properties, but the principle stays the same:
The earlier the preparation begins, the fewer compromises have to be made at the end.
Preparing an East Bay home for market?
Welcome Home Staging works with realtors and homeowners throughout the East Bay to create homes that photograph beautifully, show well, and connect with buyers from the moment they see the listing.
Whether you're preparing a vacant property, refining an occupied home, or planning the staging strategy before the sellers have moved out, involving your staging team early can make the entire listing process more efficient.
Planning an upcoming listing?
Book a staging consultation and let us help you create a clear plan before photo day.
FAQs
When should a realtor contact a home stager?
Ideally, a stager should be involved before major pre-listing decisions are finalized. This allows the staging team to provide input on furniture, paint, room function, repairs, lighting, and photography preparation rather than coming in after those decisions have already been made.
Should staging happen before listing photos?
Yes. The home should be fully staged and styled before professional photography whenever possible. Listing photography should capture the finished presentation of the property.
Is staging helpful for occupied homes?
Yes. Occupied home staging can include furniture editing, room rearrangement, accessory styling, recommendations for seller belongings, and supplemental staging pieces where needed. The goal is to make the existing home feel intentional and market-ready.
What areas does Welcome Home Staging serve?
Welcome Home Staging serves communities throughout the East Bay, including Alamo, Danville, Lafayette, Orinda, Walnut Creek, and surrounding areas.